7

I'm looking at the stitching on my hammock, wondering what kind of stitch it is and how to do it myself.

I see this marketed as a "triple interlocking stitch." But searching on Google only brings up marketing materials for hammocks. I cannot find info on how to actually sew it.

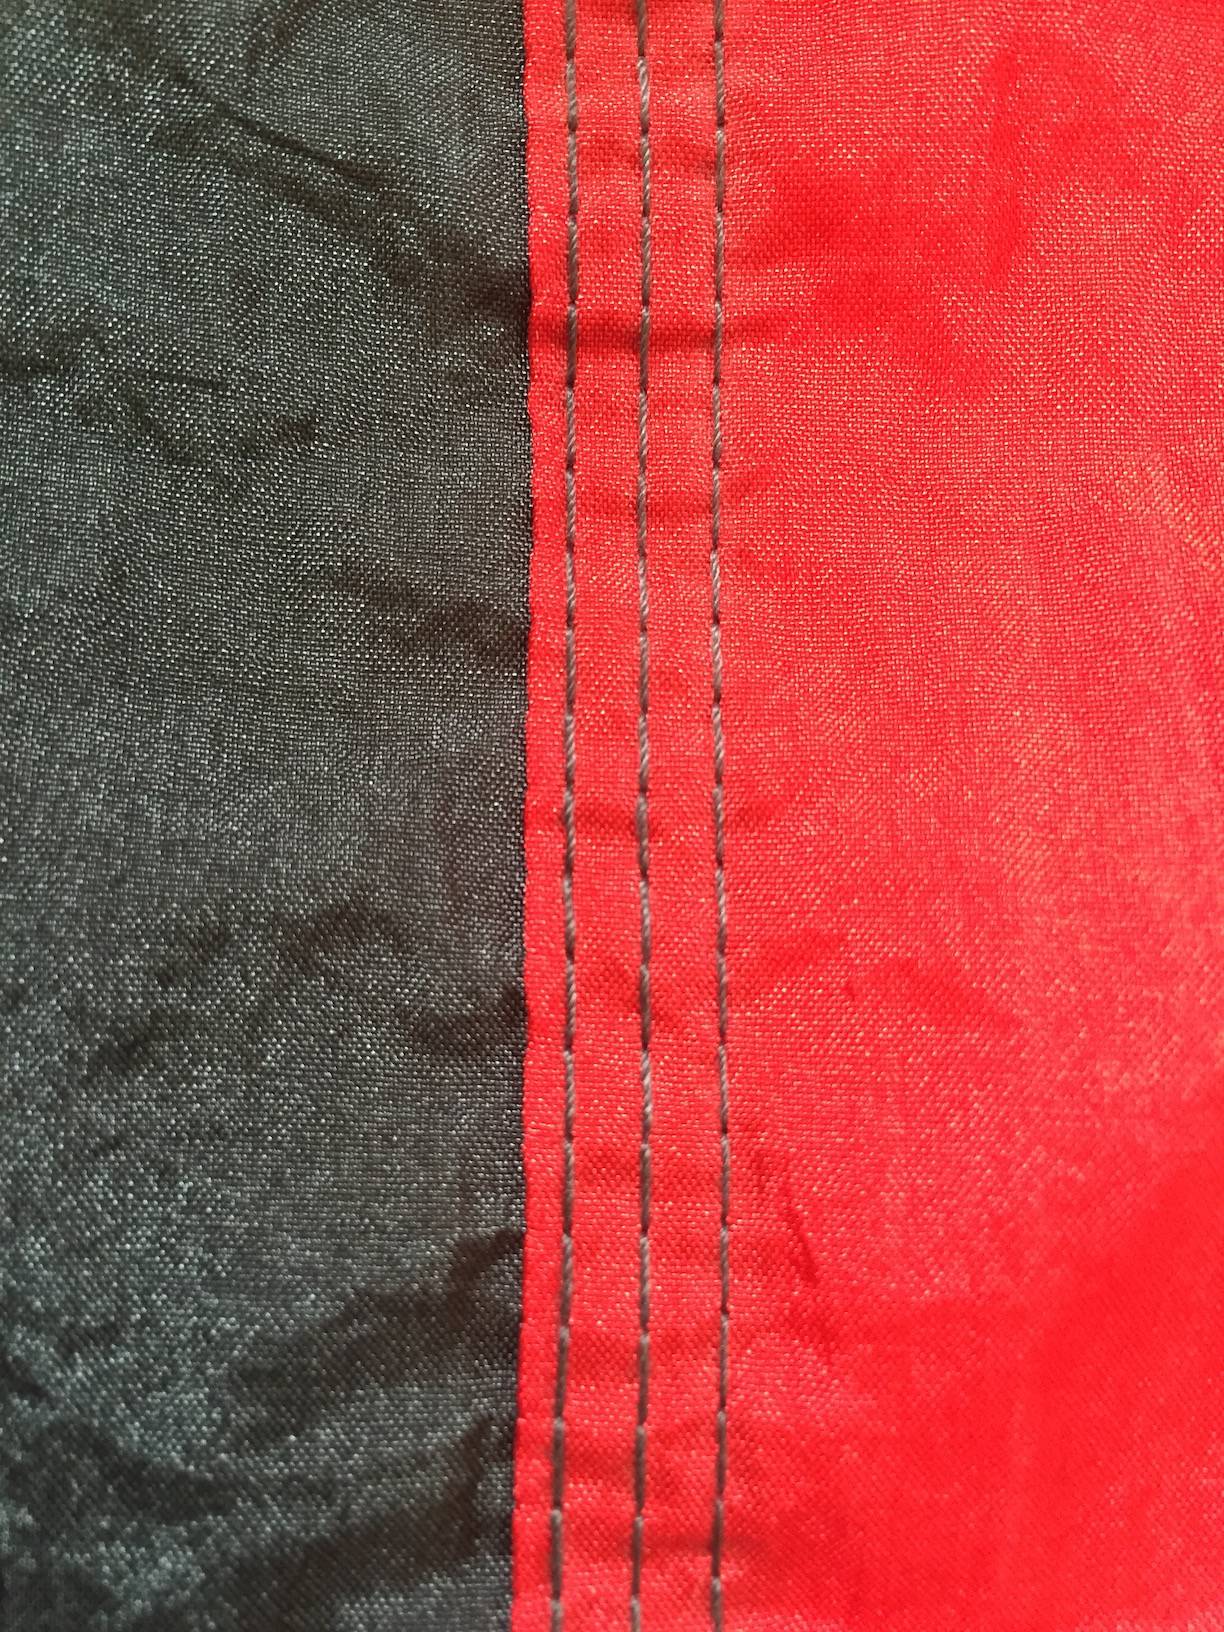
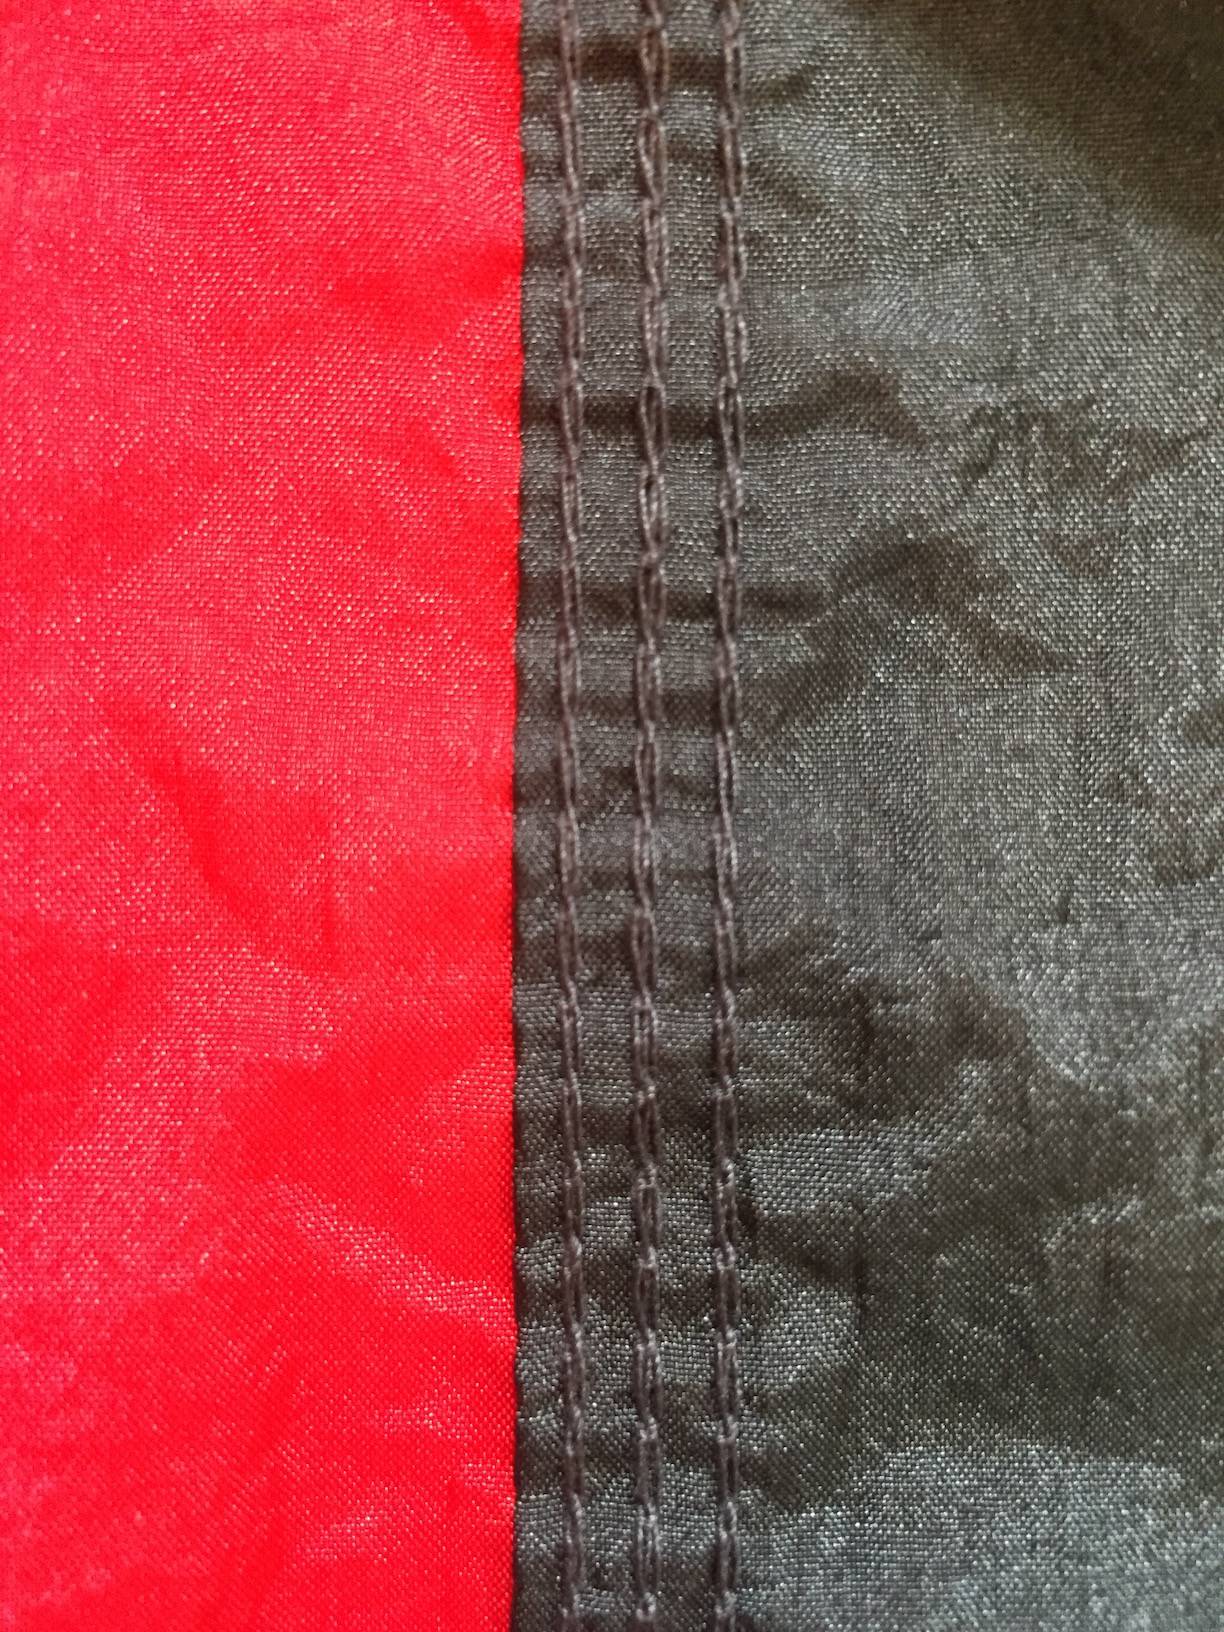
Here are pictures of the frontside and backside of the stitch.

frontside of triple interlocking stitch

backside of triple interlocking stitch

4
  • I have no clue (really) but if I had to guess, it's done on a single, specialized sewing machine that puts in all three rows of stitching at the same time... probably some sort of serger.
    – Catija
    Commented Aug 12, 2016 at 19:25
  • So the real question might be, "What is a single interlocking stitch?"
    – Ast Pace
    Commented Aug 12, 2016 at 21:08
  • My guess is that the edges are not sewn, but in fact are folded in and sewn with three rows of stretch stitches which are employed both for strength, elasticity and eliminating puckering. Are the edges folded in?
    – Ken Graham
    Commented Aug 14, 2016 at 2:11
  • @KenGraham It looks as if they are two materials on top of each other.
    – Zizouz212
    Commented Aug 14, 2016 at 3:31

2 Answers 2

5

That was made by a triple needle chain stitch machine. You can tell it was done in one pass with a triple needle machine because the holes align perfectly along the length of the stitch (making it very likely they were all formed at the same time).

You can tell it's a chain stitch (as opposed to a lock stitch, which a typical household sewing machine makes) by the way the stitches are formed on the back. Another common place to see chain stitches in your house is on jeans.

The main advantage of chain stitching (and the reason it is used in commercial applications like this) is that it doesn't require a bobbin. A home sewing machine is a lock stitch machine, which means the top thread is twisted around a bottom thread by passing over the bobbin on each stitch. The bobbin is limited in size because the top thread has to go around it. A chain stitch machine can sew much longer without interruption.

In particular, I think I see three threads on the back, which is a double chain stitch. Those extra threads don't actually add any strength. More the opposite -- chain stitches can easily be unraveled if the thread breaks, just like pulling apart a row of knitting.

If you want to recreate that seam, just sew three times with your home machine on straight stitch. You won't be able to recreate the stitch length (your home machine just won't make stitches that long), which will cause a bit of extra puckering (shortening along the seam).

By far more important than exactly what stitch you use is to use a good bonded polyester thread or an outdoor item like a hammock will fall apart when the thread rots.

(If you want to see an industrial machine that could do this, Google something like "triple needle six thread chain stitch". Six threads because it's a double chain stitch.)
4

What is a “triple interlocking stitch”?

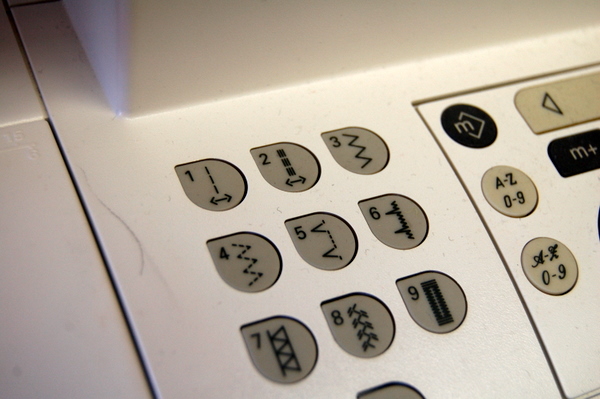
Your sewing machine may or may not have this stitch option. It’s Option #2 on (this) machine out of its seventy-five settings, which makes (one) think it’s fairly common on newer machines. It’s also known as a stretch stitch, or triple stretch stitch. Sewaholic.

Sewing options

Using a triple stitch.

It looks like this on most machines and makes every stitch 3 times over (think more like backstitching, not side by side).

So what's the big deal with using this particular stitch? It's meant for projects that require strength & elasticity and eliminates puckering on knits. This makes it ideal for t-shirts, shorts and other knit items that are frequently used for appliqué. I noticed on factory made appliqués, especially those on knits, you typically see stitching like this and that explains why those tend to last longer & look nicer than a lot of DIY versions. - Sew Can Do.

I have used this particular stitch in a project some years ago with a machine that did only one stretch stitch at a time. What I did is folded the edges of both materials in in opposite directions, interlocked the two hems and proceeded to baste the two pieces of fabric together. Once the basting was done, I passed the material through my sewing machine. When the first stitch line was completed, I repeated this stitch a second and a third time. It was not perfect , but it worked very well. I would suggest you go very slowly trying this out and at the same time trying to keep the stitch straight and in horizontal union with the stitch next to it.

Hope this helps and that I explained myself clearly enough.

You must log in to answer this question.

Not the answer you're looking for? Browse other questions tagged .